Fair American
Hatch Coamings
January 22, 2019
Day 262.
The last step before deck planking can be started is to add the hatch coamings. These are the edges of the hatches that protrude up through the deck and frame the hatch interiors that were added previously.
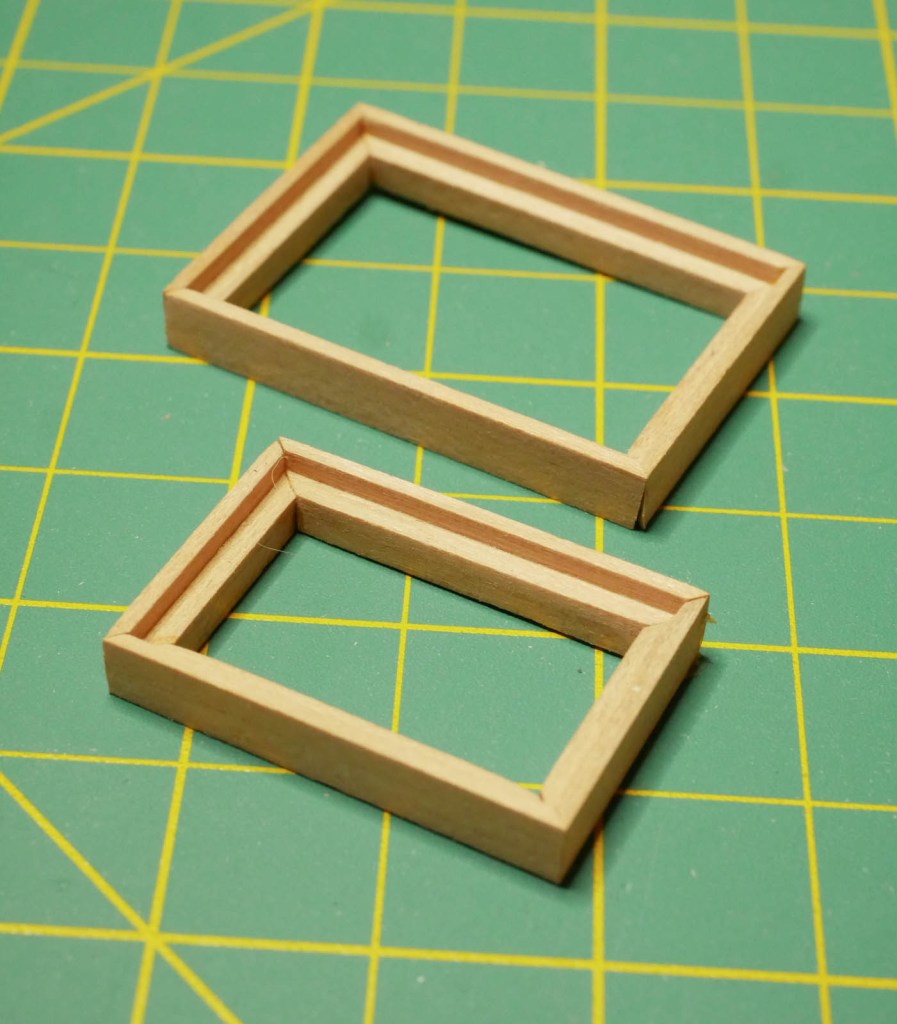
The hatch coamings are basically frames, with a lip that will support the grating at the top.
To make these, I clamped a block of wood into my Sherline mill. I milled the wood down to the right thickness (about 5.5mm), then milled the lip into the edge.

The wood was then sliced to the right thickness, and the process was repeated until I had enough of these milled strips to make all the coamings.

The coamings need to match the openings in the deck that were added previously. Pieces of the strips were cut to match those openings. Each end was given a 45 degree cut.

The pieces were then glued together, using a machinist’s square to keep things straight. Two coamings were made, each matching one of the hatches on the deck.
Both pieces were then airbrushed with red paint as indicated on plans and glued in place.

And now, there’s nothing else I can do to procrastinate…I need to start planking the deck.